As you may already know, the tool has been included in the Windows operating system for quite some time. cutbacks (Snipping Tool), so much so that Microsoft intends to do so that pressing Print Screen will, by default, open the Snipping Tool directly … In fact, if you don’t want to wait for this to happen, you can configure it yourself if you have Windows 11, so Let’s see how.
How to use crop when pressing Print Screen
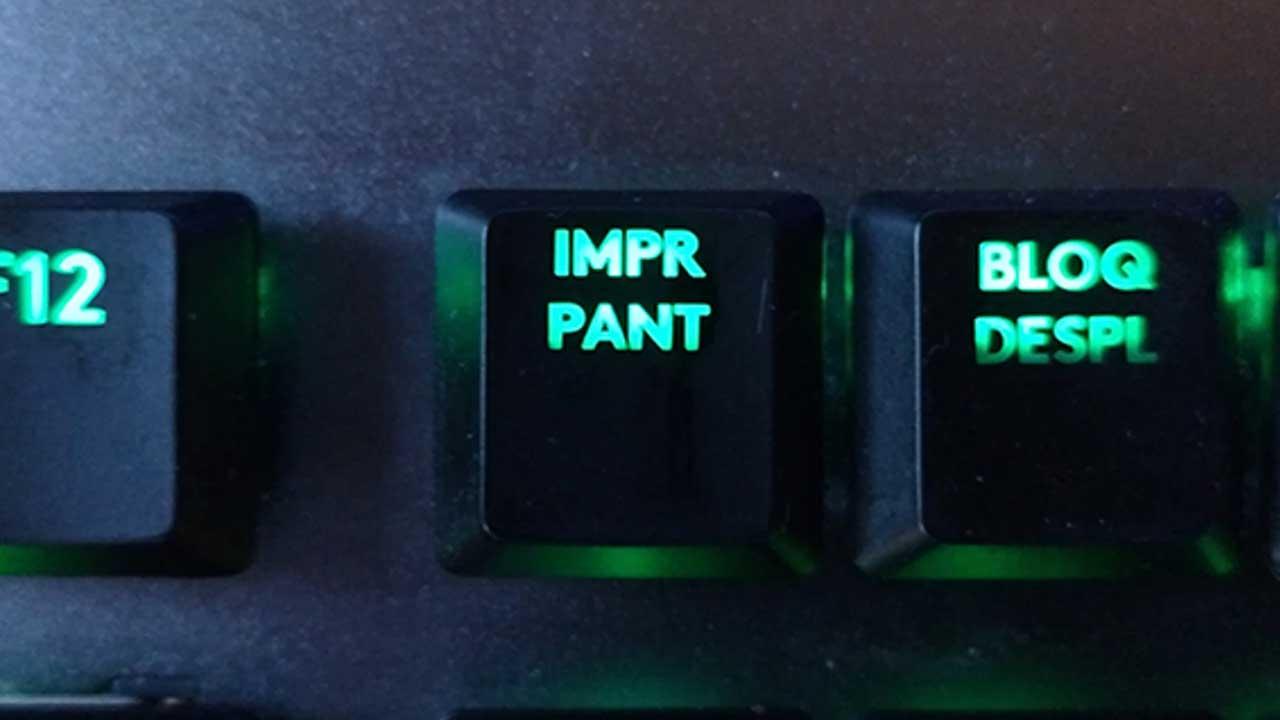
Let’s start from the beginning: if you press Print Screen on your keyboard, a snapshot of what your screen or screens are showing will simply be saved in memory at that moment, after which you will have to go to an editor such as Paint or Photoshop in order to be able to edit and save it, which is Not very ideal because, in general, you wouldn’t want to take what all your screens display, but just a small portion of them…or crop. As mentioned, in Windows 11 operating system You can have pressing Print Screen open the Snipping Tool by default, and doing so is very easy.
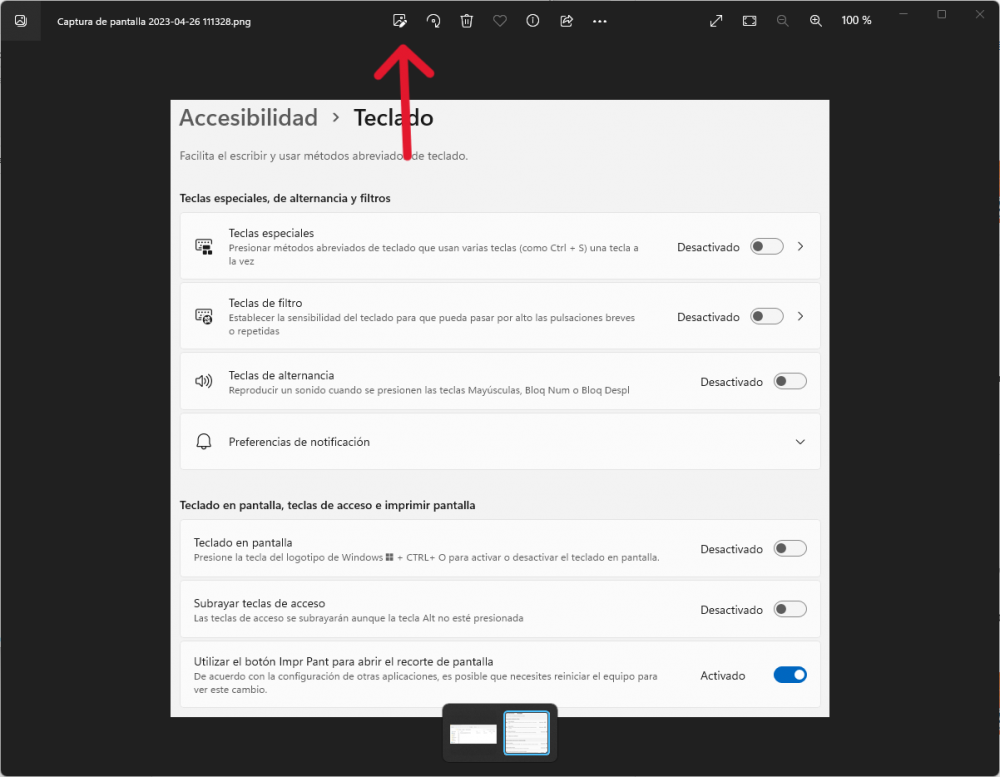
Right-click the Start button, and then click Settings. When the Settings window opens, click on Accessibility on the left side and scroll down a bit to access the keyboard. At the bottom you have the option that you have to activate: “Use the Print Screen button to open the screen cutout”.
In this way, when you want to take screenshots, if you press Print Screen Snips it will open directly, with the advantage that you don’t have to select “New” or if you want to capture a rectangle, a window or the entire screen… It will be ready for you to take the pick up as you prefer.
Where are screenshots saved?
Whenever you take a screenshot with the Snipping tool, it always allows you to edit it to some extent within the tool itself. You can click the Save button to give it the format and name you want, and also to select where you want to save it. However, you should know that the original screenshot is always saved in a specific Windows folder…
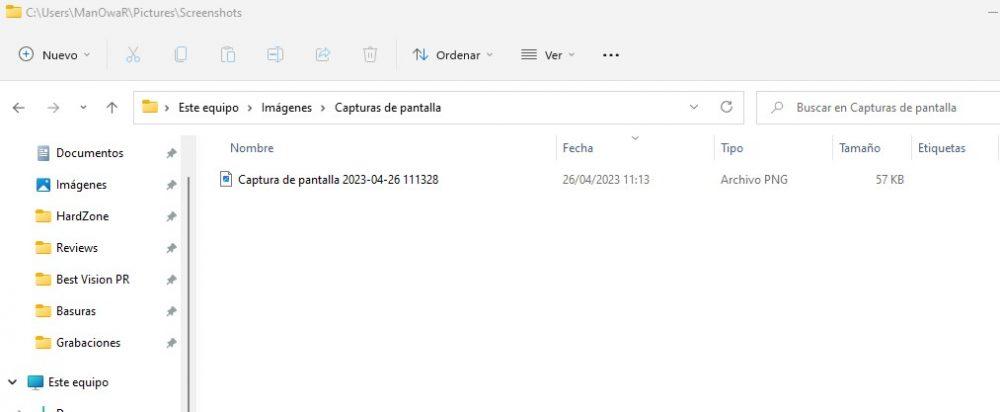
That location is C:UsersUsuarioPicturesScreenshots (replace user with your Windows username), and if you’re one of those who use the snipping tool a lot, you might be surprised at the number of screenshots saved there. Also, even if you have previously configured cutouts to save screenshots in a specific format, they will always be saved there in PNG format by default.
How to add stocks to your screenshots
Oftentimes, when you take a screenshot, it’s very important to show something to your friends, attach it to an email, make a tutorial, etc. So being able to add arrows to indicate the part you want to highlight is very important. Unfortunately, the Snipping tool does not include this possibility, but as we told you at the beginning, the idea of this article is to become an expert in screenshots without having to install an original program, so we will tell you how to do it.
Now that you know where all the screenshots you take with Snipping are saved, you can always access and edit your saved files. In this case, the idea is to open the file with a microfotoswhich is actually the app that will open by default in Windows 11. With the screenshot open, just hit the edit icon above.
When you do that, click the Review button at the top and you’ll see that the new listings appear at the bottom. You just have to click on any of the “marks” below, and logically select the color, thickness, and arrow symbol: With that, you can place as many shape and color arrows as you want on the image.
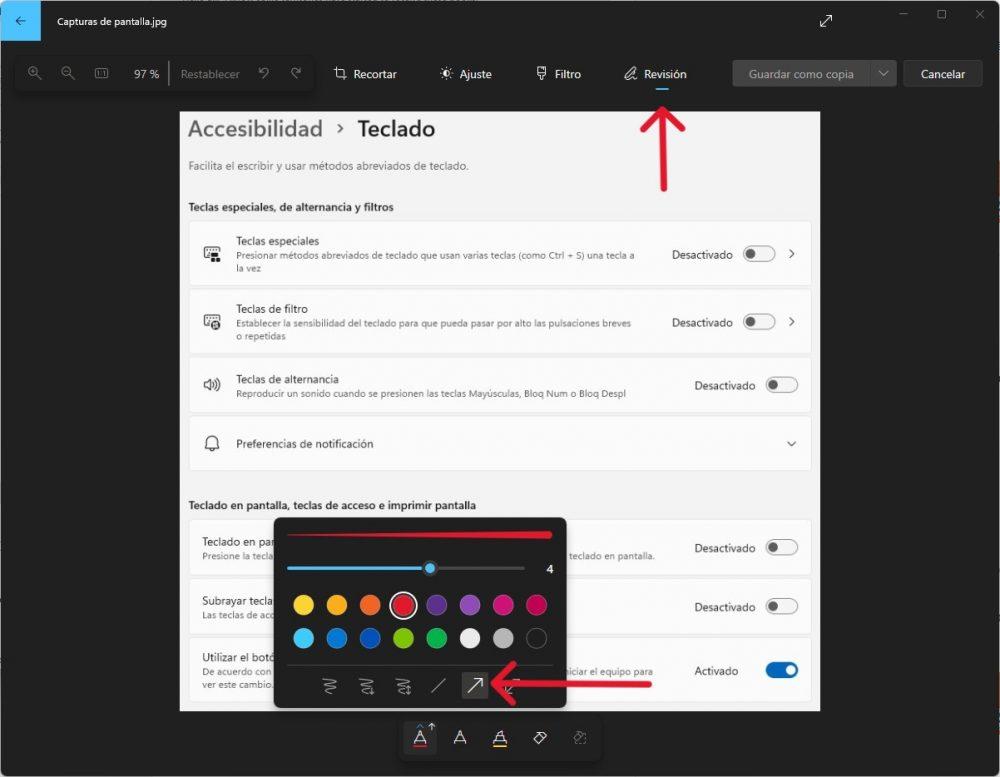
Once done, at the top you will find the Save as Copy button which, again, will allow you to choose the name, format, and location where you want to save the screenshot.
:quality(85)/cloudfront-us-east-1.images.arcpublishing.com/infobae/YGI75MV4B5CSXJJC6NYFQY3FC4.jpg)
:quality(85)/cloudfront-us-east-1.images.arcpublishing.com/infobae/5BDDJARB2DKVTEKYULAVO6VS6A.jpg)
:quality(85)/cloudfront-us-east-1.images.arcpublishing.com/infobae/7I7PSECK5JBIPPLDCAHDL4YDYQ.jpg)
